Sunday, April 22, 2012

Painting SdKfz 251 (D)

My recent project relates to SS-Panzerpionier Company I'm currently working on. I have already painted a single platoon and now it is time to add more half-tracks. Unfortunately (or fortunately), I received an airbrush meanwhile, so probably I will have to re-work four previously painted half-tracks.

I decided to document my work on the half-tracks. Maybe someone find it useful. What I'm going to paint? I have three SdKfz 251/7D by Battlefront and five SdKfz 251/1D by the Plastic Soldier Company.

I'm sorry for the quality and inconsistency of photos. They were made at different stages of the project, in different places and with different lighting sources, so they might be a little bit misleading if you consider the exact shade of models.


1. Prime the models

The first step is rather obvious. I had to prime the models so the surface is ready to be covered with other layers. I was using the army painter's cans, but since I had an airbrush I've started to use Vallejo 74.601 - Grey Primer (Acrylic-Urethane). It takes little bit more time to prime the models, but I enjoyed it more, and it doesn't smell so toxic as the paint in cans ;)

2. Pre-shading

I decided to try a new technique (at least for me ;), which is called pre-shading. The idea is to emphasize all the shaded places with dark paint - e.g. black. Then, when you base coat you should put thin layers to let the shading be visible through it. To be honest I was not able to obtain the effect I wanted. 15mm models are so small that this technique is very difficult to use. I'm also not an airbrush pro, so maybe some other time I will be able to make a good use of this technique. For now I think that washes will better do the work.

3. Base coat

The base coating was also done with an airbrush. I used a mix of Vallejo middlestone and white in proportion of 5:2 thinned with Vallejo 71161 thinner. I had to mix the base color with white because further steps are going to make the model darker. Once you make the model dark it is not much you can do to increase the contrast. Actually, you can only dry brush, but if you do too much of it, models start look unrealistic.

4. Camouflage

And now the time for painting camouflage. I used a standard combination of Vallejo reflective green and chocolate brown. I used to hate this stage, but with an airbrush it started to be a pure pleasure. You just can't do it wrong ;) The only problem you can encounter is incorrect thickness of paint (I mean too thick paint) or a problem with correct pressure.

Reflective green and chocolate brown

5. Filters

The next stage was to apply filters. This is a technique I used for the second time (the first time was with Panthers). First you have to prepare (or buy) a filter. I use oil paints and turpentine, which you have to mix to create a very diluted wash. Let say 1:10. Then you apply very thin layers of the filter. When it dries, it changes the shade of the model and makes the edges of camouflage smooth.

I apply first layers of dark filter, which is black + brown. Then, I apply the one with light ochre.

After brown + black filter (more brown)
5. Dry brush

Although I'm not a huge dry brush enthusiast, I think that if done in limited way it enhances a model in such a small scale as 15mm. Unfortunately, sometimes I had to use more of it to light up the model that I initially made too dark.

With the half-tracks I decided to do a limited dry brushing with a mixture of oil paints: light ochre and white. I dry brushed mainly the edges of the model to make the silhouette of the vehicle more visible.

After a limited dry brushing of edges with a mixture of light ochre and white oil paints

6. Tracks

I started to paint tracks with a 50/50 mixture of german gray and gunmetal gray. It gives the base color and small amount of gunmetal makes it glimmering a little bit. Then, I dry brushed it with pure gunmetal grey. Finally, I prepared a mix of white and gunmetal gray, and dry brush it quite delicately. This makes the tracks a little bit too shiny, but don't worry.

The next step is to wash the tracks. I use a cocktail of burnt sienna and turpentine mix for that (1:4). You can also add a little bit of light ochre. This makes the tracks look rusty.

Finally, I re-did the last dry brush to make the details more visible.

The process of painting tracks

7.  Assault bridges

In all the photos of SdKfz 251/7Ds that I've seen so far, the assault bridges were painted in the same color as the vehicle, however, I decided to make the bridges more visible and paint them with grey color. You can see the same idea in the Battlefront's spotlight of the product. Actually, I followed the same procedure as with tracks, however, I decided to not make it less shinny.

Assault bridges of SdKfz 251/7D

8. Exhaust pipes

Sooner or later exhaust pipes get rusty, especially if in difficult conditions in which battle vehicles are used.
I obtained the rust effect by starting from painting the pipe with Vallejo hull red. Then, I gave them a wash with exactly the same mixture of paint as for tracks. Exhaust pipes were also pin washed as all other details. Finally, I used a Vallejo burnt sienna pigment, which I mixed with matt varnish (it gets sticky then) and put it into exposed parts of a pipe. This makes the surface look more bumped.


Exhaust pipes - so rusty - so nice :)

9. Details

Well, the next stage was pretty boring... I had to paint all the details. If you consider 8 half-tracks full of stowage, this make the task exhausting...

I use the following colors to paint stowage:
  • Cloth - two pea leaf patterns: background Vallejo palm brown; summer version - Vallejo dark cam. green with bright cam. green; autumn version: Vallejo chocolate brown with bright brown.
  • Bags (and some cloths): background Vallejo beige and dark sand to highlight.
  • Cans - Vallejo middlestone (highlighted with the same color mixed with white).
  • Helmets - Vallejo german field grey (highlighted with the same color mixed with white).
  • Wood elements - Vallejo beige brown.


10. Pin wash

Pin wash is one of the key steps in painting models in my opinion. It helps to expose the details by adding shadows. I use a mixture of oil paints (brown and black) diluted with turpentine (4:1).

Half-tracks after pin wash

11. Decals

Decals add some realism to the models. This time I used the decals that you can buy at Maelstorm. I especially like the registration plates...

I apply decals right on the surface. Only if I have to tackle with zimmerit, I apply a layer of gloss varnish before. After a while I apply decals softener by Humbrol, which in my opinion is a very important step. It makes decals borders less visible. Finally, I apply the coat of matt varnish with a brush.

12. Battle damage

It is a matter of taste if you like weathering of vehicles or not. I personally like to see some battle damage on vehicles. However, it is quite easy to add too much of it, which makes them look like scrap (actually it spoils all the work one has put into the model).

My guru when it comes to adding damage is Ruben Torregrosa, who is painting miniatures for Forged in Battle. You can see his works on his blog. Beautiful, aren't they?

I followed the foam technique with the half-tracks. I mixed german grey with hull red (50/50) and used blister foam to apply scratches. To be honest this requires a little bit of practice, because it is easy to apply too much of dots. When you apply the paint remember to make some pats on the paper towel to remove the paint. Then pat the edges of the model.


13. Crew

Another element that makes models look more realistic is to add some crew members. I decided to add only the Battlefront figures as they don't look well together with the PSC ones. I used the standard painting of SS infantry, leaving some of the Germans in field grey uniforms, if I will have to use the half-tracks with Heer forces.


14. Varnish

Finally, the last coats of matt varnish applied with an airbrush.

Final result

It is time to celebrate a new set of vehicles in my small army... I will consider adding some foliage camouflage later on. More photos are available in the gallery.


Sunday, April 1, 2012

SdKfz 251 (D): BF and PSC detailed comparison

Today, I would like to present you a comparative review of german half-tracks SdKfz 251 in late variant D. I will compare models provided by Battlefront (BF) and the Plastic Soldier Company (PSC).

Half-tracks are the basis of any mechanized company, including panzerpioniers that I personally collect. Unfortunately, you will require many of them in order to field even a basic company - the minimum number is around ten. If you think about BF products it means that you will have to spent around 100 Euro. Taking into account that half-tracks are going to spend most of the time off the table it sounds quite annoying... (fortunately, since the FOW version 3 half-tracks seem to play a more important role). This forces many of players to look for cheaper options to build their mechanized companies.

If you think about cheaper models, one of the providers that you should take into account is the Plastic Soldier Company. They provide plastic models in both 15mm and 1/72 scales. They have released couple of best sellers so far. One of them is their SdKfz 251 - offered in two variants C and later D.

In this review I'm going to focus on variant D, and try to check if the half-tracks provided by PSC can be used together with BF products.

Battlefront's blisters contents

Battlefront's blisters with additional stowage and crew blisters
Battlefront offers plenty of different 251s variants. I have in my collection one basic 251Ds (GE241 - SdKfz 251/1D) and couple of 251/7Ds (GE249 - SdKfz 251/7D) used by panzerpioniers.

In each blister you will find a resin body, plastic sprue (containing tracks, assault bridges, 3 MGs, and front wheels), a gunner, and 20mm cannon. As usual, the quality of BF's model is really high. There is not much you have to do to clean the parts.

Unfortunately, you will not get additional crew members and stowage in a blister. However, you can buy a separate special-order blisters to customize your half-tracks a little bit.  If you consider the price of a model and necessity of buying additional packages this is clearly a disadvantage of the BF models.

PSC's box contents

The PSC box containing 5 half-tracks and extra crew and stowage
The Plastic Soldier Company offers their half-tracks in boxes of 5 models (recently they introduced an option to buy separate sprues). You will find 5 sprues in each box. Each, gives you a possibility of assembling a standard 251D. I have to add that each sprue contains lots of additional stowage and crew members. Some of them might be extremely useful when building other dioramas, e.g., panzershrecks, mauser rifles, etc. I will not enumerate all the elements, if you are interested in the topic, visit this link to see the content of a single spure.

The quality of models is very high. All elements are casted nicely. Still, you will have to clear some of the parts a little bit.

Assembling models

Assembling BF models is pretty easy. You will have to glue tracks, front wheels, and machine guns. I had a problems with front wheels in some of the blisters. They were not fitting the holes in the body well. Nevertheless, it was a minor problem.

Assembling PSC models is a little bit more difficult. If you have ever assembled plastic 1/72 models you will find it enjoyable, as I did. The only problem is that if you have to assemble many of them at once (what is rather typical in wargaming) it starts to be a little bit annoying.

Models size

OK, and now the part for which most of you came here ;) - comparison between both models. I will not elaborate too much on it. You will find all the measures in the photos below. What I can add from myself is that the models look really good together. The models you see below have different paint jobs, so the difference is quite visible, however, when you look at the photo at the beginning of the post you will see that PSC's 251Ds looks quite compatible with BF's 251/7Ds if they share the same camouflage pattern.

PSC (left) and BF (right) models left view
PSC (left) and BF (right) models front view 
PSC (left) and BF (right) models rear view
PSC (left) and BF (right) models top view

Differences between models and their historical accuracy

Finally, I would like to talk a little bit about the main difference between the models and their historical accuracy. The silhouette of both models seems similar, however, the main difference is in frontal part of both vehicles - the slope of armor and frontal plate.

Also the crew members seem to be little smaller in PSC models than figures produced by Battlefront. They will not look good if placed together in a single vehicle.

You can find the most important differences between models at the photo below:

The most important difference between PSC (left) and BF (right) SdKfz 251Ds

Wednesday, February 29, 2012

BF: Opel Maultier (GE275) Review

Don't you think that collecting miniatures for FOW or any other system could be divided into two stages? First you start from getting some core models of infantry and tanks, and after that you start to collect some more specific and less frequently used models like trucks, jeeps, etc.

Today I would like to talk a little bit about the models belonging to the latter group - Opel Maultiers. I decided to get a blister of these as a part of doing SS-Panzerpioniers project. The main problem was that I rarely could find points in my orders of battle to put them into the roster. Fortunately, in 3rd edition rules regarding remote-controlled toys were limited to a sensible level (although it will reduce the firepower of my pioniers I think it is a good change), and right now choosing a supply vehicle instead of a goliath starts to be reasonable (still, if you have points - go ahead and take both ;)

OK, but back to the point. Battlefront has two models of Maultiers in its products range. If you prefer the version with a removable cover of the transport compartment you should go for the GE274 Opel Maultier set - 16 Euro. The cheaper version is the GE275 Opel Maultier, which costs only 9 Euro. In each of option you get two models.

As I realized that Maultier is not a key vehicle in my company I went for the cheaper option. Unfortunately, I don't have the second one to compare with.

Blister contents

You will find two fully resin models in the blister. They are pretty heavy, so they lay comfortably in hand. Models are beautifully sculpted. There were only two moulds I had to remove. Unfortunately, both models look completely the same and there is not much you can do to customize them.

Model size

You can find exact measures of the models in the picture on right hand side.

Base:
- length: 6,3 cm
- width: 3,0 cm

Vehicle model:
- length: 5,7 cm
- width: 2,0 - 2,1 cm
- height: 2,7 cm

Gallery

Couple of photos of battle-ready models:


Sunday, January 22, 2012

Meet my army: Part VI - SS-Panther Platoon

I finally managed to finish the SS-Panther platoon I was working on recently. It was also a platoon that I experimented on with the couple of new techniques.
First of all, I used an airbrush to paint the camo for the first time. Unfortunately, I had problems with leaking air, but somehow I managed to paint what I needed. Second technique was filtering. It is a technique quite similar to washing, but you have to dilute the paint little bit more (I used oil paints and turpentine) and use nearly dry brush, which is the main difference from wash (where you apply dots of paint). It gives really nice effects. You can apply many layers and observe how colors change. I started with a mixture of brown and black and than applied couple of layers of light ochre. Finally, I tested a new technique for foliage camouflage.


You can find couple of photos below and the full gallery here.

I plan to use the panthers together with the SS-Panzer Pioniers I'm currently working on. We will see how they work together. 
However, I had a chance recently to test the panthers against Kondziu and his new Soviets from the Red Bear book. I prepared a Panzergrenadier Kampfgruppe form 5th SS division "Wiking" from the Grey Wolf book. It was really sad to see how ten T-34/85 and three SU100 chased my trained panthers here and there... sad...really sad.

Hans is a good commander, he navigates well in the unknown terrain


Ups... Hans had a wrong uniform, now it is correct...


Wednesday, January 18, 2012

Realistic foliage camouflage revisited

Today, I would like to go back to the topic on which I was already writing once - foliage camouflage. Last time I was talking about two ways of making this kind of camouflage. The first one was a simple camouflage made from clump foliage, the second one was more advanced. I used a tiny wire and leaves produced by Noch. The latter approach was definitely more realistic than the first one, but it was quite consuming and I was not fully satisfied with how the branches looked like.

Well, I try to continuously improve my modeling and painting techniques, so I decided to go back to the topic. I have to give a credit to the member of the FOW forum under the nick "Zoolander" who published a great tutorial on painting 15mm Panzer IVs. The idea I present here comes from his post on the Battlefront's forum.

The solution is a little bit more expensive than the one with a TV cable wire I presented before, but it is definitely easier to apply and effect is marvelous.

Step 1. Gather materials

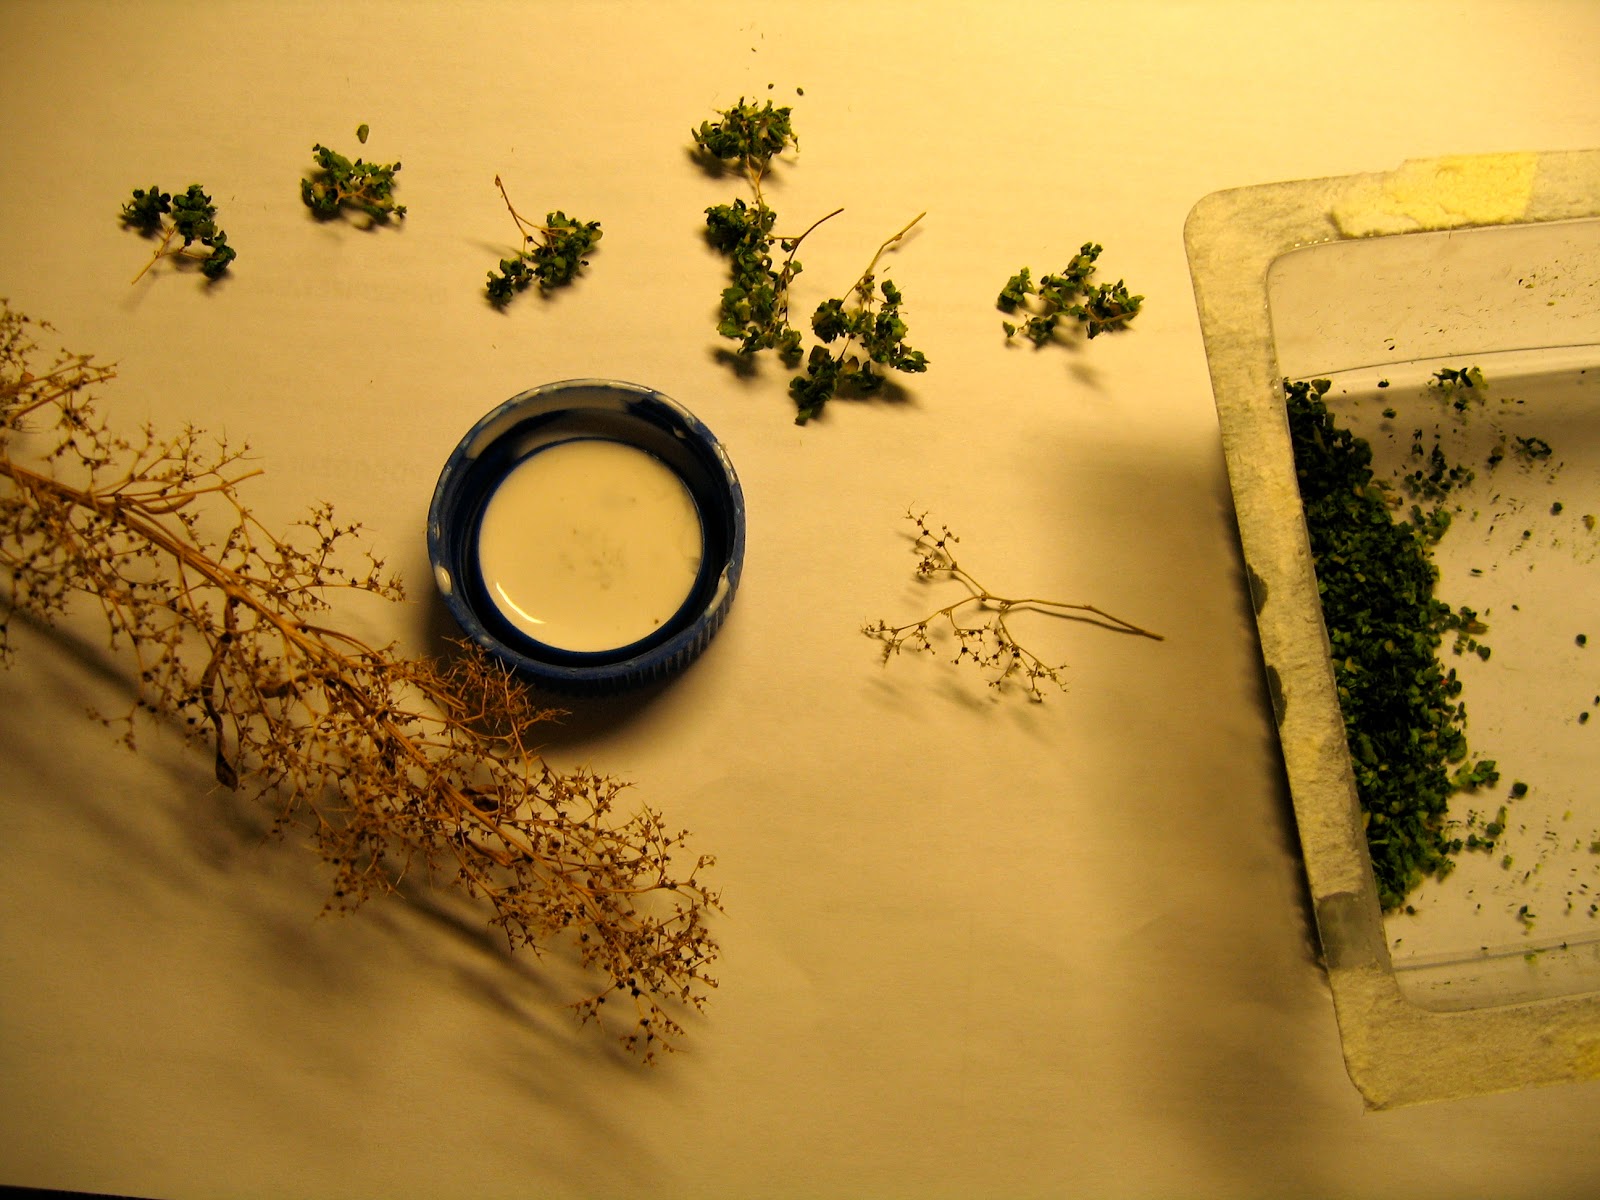
This time you have to buy a Noch 23100 set. It contains a natural foliage - yes they look like real, dry plants (and they are real in fact). A mega-pack I bought costed me around 15 EUR. I have to mentioned that I used only a single piece of "bush" from the pack to produce a bunch of ready to use branches. In addition, you will have to buy leaves. I had two kinds of them. The first one was the pack of dark green leaves produced by Noch that I used last time. I mixed them with the Heki 3398 lighter colored leaves. I am really pleased with the color I obtained.

Step 2. Prepare branches

The second step is very simple, just tear apart small branches from the "bush branches".


Step 3. Glue the leaves

Now, cover each of branches in glue and then put it into the leaves - so simple :)


Step 4. Leave for while to dry

Finally, leave it for a single night alone, so the glue dries. That is all :) Below you can see the number of ready to use branches I obtained from a single piece of "bush" from the Noch's set.


The final effect...


Sunday, January 8, 2012

How to make a 15mm bucket

I've never thought that I will write tutorial about buckets ;) Well, there is always the first time...
Right now I am working on the platoon of three Panthers. As always I like to make a little research before I start to paint to get some inspiration. One thing that made me curious when I was looking at photos of Panthers was a small bucket that was placed in the rear part of the tank. Actually, I've seen it many times in photos of different tank models. I still have no idea what it was used for - I only suspect that it could be used by a crew to refuel a tank. Nevertheless, I decided to add a bucket to one of the tanks.
This file is licensed under the Creative Commons Attribution-Share Alike 3.0 Germany license

OK, but how to make such a tiny bucket... I had one in the Battlefront's "half-track stowage" blister. Unfortunately, it was strictly connected to couple of other things that made it useless in this context. So I decided to make one on my own.

I started with an idea of modeling it with green stuff. Needless to say it turned out that I'm not a gifted sculptor... It looked more like a piece of amateur pottery than a real bucket. So I started to obsessively look for anything that could be used for that purpose. After couple of days I found it - so simple - my old paintbrush!

It is extremely easy. Find a small brush, cut the tip. Then, take a piece of thin wire (mine is from TV cable) and use it as a handle. Here you are. Another benefit you can renew your brush :)


Thursday, January 5, 2012

PSC SdKfz 251/1D Arrived!

Couple days ago a long awaited (since October) box of SdKfz 251/1D arrived to my kingdom. These were produced by the Plastic Soldier Company (PSC). Actually, PSC released couple of interesting sets of 15mm models that could be a serious alternative to Battlefront miniatures. They are competitive not only if the price is considered but also when one thinks about the quality of casting.

From the beginning I will have to admit that I love the SdKfz 251 models provided by Battlefront. They are really nice. I have seven of them right now. Unfortunately, each half-track costs the same amount of money as a regular tank. This is the main issue if you ask people why they are not collecting mechanized infantry companies. You have to have more than ten of them, and what is the biggest drawback is that in many cases you won't even place them on table (yes they are transports, they count to causalities...).

And here is the spot which PSC found they market target. They are producing models that are used in large numbers by players. They started from realeasing T-34s, Panzer IVs, and infantry sets (Russian and German late-war infantry), and quite quickly started to introduce new models: SdKfz 251/1s C and D, StuGs, Shermans, Panzer IIIs.

Today I will only bring you one photo of the set - mainly to show you that the models seem to be perfectly accurate in comparison with Battle Front if size is considered. They are even historically more accurate than Battlefront's - they have boxes inside which are characteristic for the model 251/1D. In addition, you will get lots of stowage with them, which you can use to enhance your other models (e.g., I will add spare tires to my SdKfz 231s).

Unfortunately, they will have to wait in painting queue to get assembled. I will share photos as soon as they are ready.

Comparison between Battlefront's (the one assembled) and PSC's SdKfz 251/1D